Why Your Tap Water Could Be Silently Killing Your Hydroponic Garden
You’ve invested in quality nutrients. You’ve dialed in your lighting. Your grow room temperature and humidity are spot-on. Yet your plants stubbornly underperform — yellowing leaves, stunted growth, and yields that fall embarrassingly short of what the seed packet promised.
The culprit? Your water.
Most hydroponic growers obsess over nutrients and light while completely overlooking the single most fundamental input in their system: water quality. Tap water and well water carry invisible passengers — chlorine, chloramine, calcium, magnesium, sodium, heavy metals, and dozens of other dissolved solids — that interfere with nutrient uptake, clog emitters, and create toxic imbalances in your reservoir.
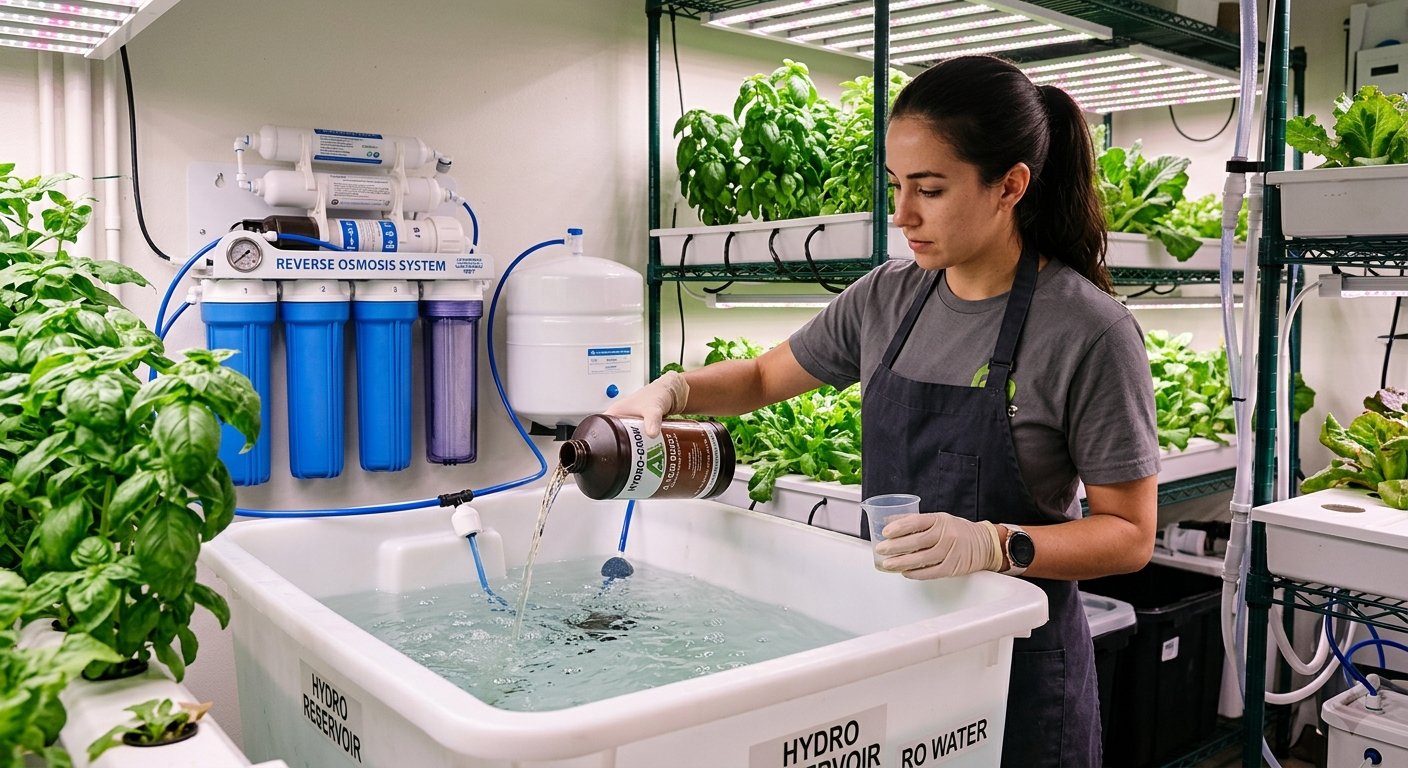
A hydroponic reverse osmosis system is the solution that professional growers and serious hobbyists swear by. It strips your water down to near-pure H₂O, giving you a clean, blank canvas to build the perfect nutrient solution — one your plants can absorb fully and efficiently.
This comprehensive guide will walk you through everything you need to know: how RO systems work, why they matter specifically for hydroponics, how to choose the right system, and exactly how to integrate one into your setup for maximum results.
What Is a Reverse Osmosis System and How Does It Work?
The Science Behind Reverse Osmosis
Reverse osmosis (RO) is a water purification process that uses pressure to force water molecules through a semi-permeable membrane. This membrane has pores so tiny — typically around 0.0001 microns — that they allow only pure water molecules to pass through while blocking dissolved salts, minerals, heavy metals, bacteria, chlorine, and virtually all other contaminants.
In natural osmosis, water flows from a low-concentration solution to a high-concentration solution across a membrane. Reverse osmosis, as the name suggests, flips this process. By applying mechanical pressure (typically from your home’s water supply pressure of 50–80 PSI), water is pushed from the high-concentration side (your tap water) through the membrane, leaving the contaminants behind in what’s called “reject water” or “brine,” which is flushed down the drain.
Key Components of an RO System
A standard reverse osmosis system for hydroponics consists of several filtration stages:
Sediment Pre-Filter: The first line of defense, this filter captures large particles like sand, rust, and sediment that could clog or damage the delicate RO membrane. Typically rated at 5 microns, it significantly extends membrane life.
Carbon Block Pre-Filter: This stage removes chlorine, chloramine, volatile organic compounds (VOCs), and other chemicals that would degrade the RO membrane. This step is critical — chlorine is a membrane killer, and skipping proper carbon filtration will require you to replace your membrane far too frequently.
Reverse Osmosis Membrane: The heart of the system. This thin-film composite (TFC) membrane is where the real purification happens, typically rejecting 95–99% of total dissolved solids (TDS).
Post-Carbon Filter (Optional): Adds a final polishing stage to remove any residual taste or odor before the water reaches your reservoir.
DI (Deionization) Stage (Optional but Recommended): A deionizing resin stage that follows the RO membrane can push TDS readings from 5–20 ppm all the way down to 0–1 ppm. For growers who need absolutely pure water, this is the gold standard.
Understanding TDS and Why It Matters
TDS — Total Dissolved Solids — measures the concentration of all dissolved substances in water, expressed in parts per million (ppm) or milligrams per liter (mg/L). Typical tap water runs between 100–400 ppm, sometimes higher in areas with hard water. After RO filtration, TDS drops to between 0–30 ppm. With an added DI stage, you can achieve 0–5 ppm consistently.
Why does this matter for hydroponics? Because every ppm of dissolved minerals in your source water is a ppm you didn’t choose to add. When you mix nutrients into high-TDS source water, you’re creating a recipe with unknown ingredients, making it impossible to accurately dose your plants.
Why Hydroponic Growers Specifically Need Reverse Osmosis Water
Achieving Precise Nutrient Control
Hydroponics is, at its core, an exercise in precision. Unlike soil growing, where the growing medium buffers and modifies what plants receive, hydroponic plants get exactly what you put in the reservoir — nothing more, nothing less. This precision is both the system’s greatest advantage and its greatest demand.
When you start with RO water at 0–10 ppm, you have complete control over your nutrient solution. Every element you add is intentional, measurable, and adjustable. You know exactly what your plants are receiving at every stage of growth, making it possible to fine-tune your formula with scientific accuracy.
Starting with high-TDS tap water (say, 300 ppm) means roughly half your “nutrient budget” is already consumed by minerals you didn’t choose. Worse, you don’t know whether those minerals are calcium, sodium, bicarbonates, or heavy metals — each of which interacts differently with your intentional nutrient additions.
Preventing Nutrient Lockout and pH Instability
High mineral content in source water, particularly carbonates and bicarbonates, creates a powerful buffering effect that fights against your pH adjustments. Every time you try to lower pH to the hydroponic sweet spot of 5.5–6.2, bicarbonates push it back up. This constant pH war exhausts pH-Down solutions and creates wild swings that stress your plants.
Calcium and magnesium in hard tap water can also precipitate (fall out of solution) when they encounter phosphates from your nutrient mix, creating insoluble compounds that lock out nutrients and create white crystalline deposits on roots, pumps, and reservoir walls.
RO water essentially eliminates these conflicts. With near-zero dissolved solids, pH stability improves dramatically, and you gain the ability to use specific calcium-magnesium supplements precisely calibrated for your plant’s needs at each growth stage.
Protecting Your Equipment
Hard water is devastating to hydroponic equipment over time. Calcium carbonate scale builds up inside pumps, clogs drip emitters, coats net pots, and encrusts reservoir walls. Removing this scale requires harsh acids and significant downtime. In drip and NFT (Nutrient Film Technique) systems, scaling can completely block the small orifices that these systems depend on.
RO water, with its near-zero mineral content, produces no scale. Your pumps last longer, your emitters stay clear, and your reservoir cleanup between cycles becomes dramatically easier — often requiring nothing more than a rinse and wipe-down.
Eliminating Chlorine and Chloramine Damage
Municipal water treatment uses chlorine or chloramine to kill bacteria. While this is beneficial for drinking water, these disinfectants are harmful to the beneficial microbiology that many hydroponic growers deliberately cultivate in their systems — particularly those using beneficial bacteria or mycorrhizal fungi in their root zones.
Even without living biology in your system, chlorine can chemically react with certain nutrients, degrading them before your plants have a chance to absorb them. RO filtration removes 99%+ of both chlorine and chloramine, protecting your nutrient integrity and any beneficial biology you’ve introduced.
Choosing the Right Hydroponic RO System
Sizing Your System: GPD (Gallons Per Day) Explained
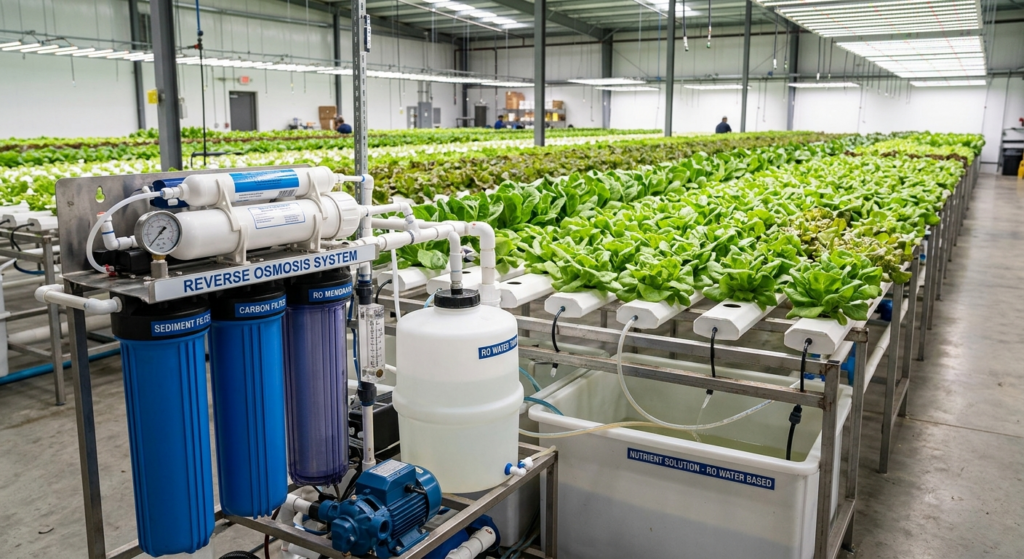
RO systems are rated by their output in gallons per day (GPD). Common ratings include 50 GPD, 100 GPD, 150 GPD, and commercial units at 300–1,000+ GPD. Choosing the right size depends on your reservoir volume, how frequently you change or top off your reservoir, and whether you’re filling from scratch or just topping off.
For a small home setup with a 20–50 gallon reservoir that you change weekly, a 50–100 GPD system is typically sufficient. A 100 GPD system produces about 4 gallons per hour under ideal conditions. For larger commercial operations or multiple grow tents, step up to 150–300 GPD or invest in a commercial-grade system.
Keep in mind that RO systems produce reject (waste) water alongside purified water. Standard consumer systems reject 3–4 gallons of water for every gallon of purified water produced. High-efficiency models and “zero waste” systems use the reject water in creative ways (like sending it to a garden hose or toilet) to reduce waste.
Key Features to Look For
Membrane Quality: Look for thin-film composite (TFC) membranes from reputable brands. Premium membranes reject 98–99% of TDS versus 90–95% for cheaper alternatives — a meaningful difference when starting water quality is your foundation.
Pre-Filter Quality and Accessibility: Carbon block pre-filters should be rated for at least 5,000 gallons. Easy-to-replace filter housing (standard 10-inch cartridges are ideal) makes maintenance straightforward and affordable.
Pressure Gauge and Flush Valve: A pressure gauge lets you monitor system performance and catch membrane degradation early. A flush valve helps extend membrane life by periodically scouring the membrane surface.
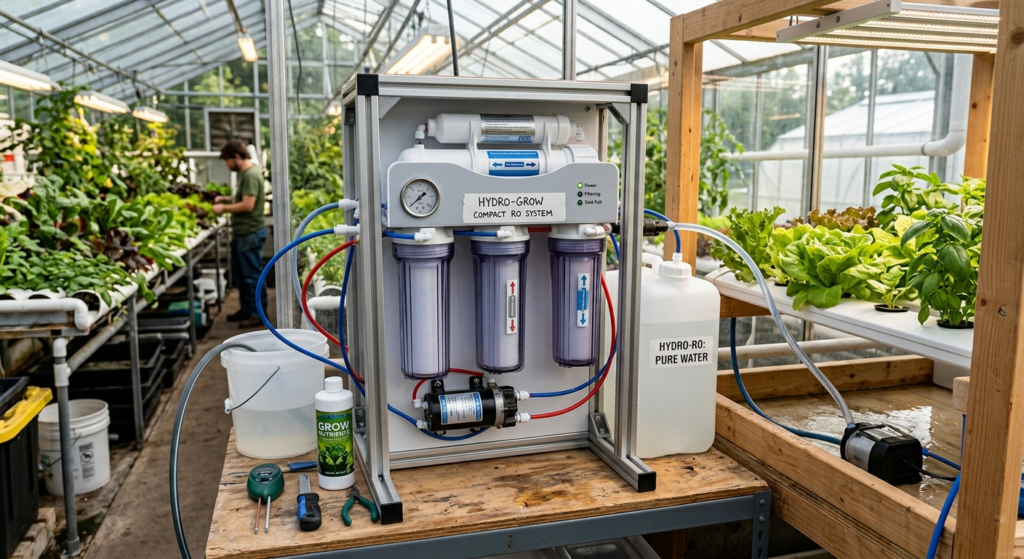
Storage Tank (Optional): Many systems include a pressurized storage tank that holds 3–5 gallons of purified water, ensuring you have RO water on demand without waiting for the system to produce it in real time.
TDS Meter Compatibility: Some premium systems include inline TDS meters before and after the membrane, giving you instant visibility into membrane performance. This dual-reading setup lets you calculate rejection rate and know exactly when your membrane needs replacement.
RO vs. RO/DI: Which Do You Need?
For most hydroponic applications, a standard RO system producing water at 5–20 ppm is more than adequate. The addition of a DI (deionization) resin stage — creating an RO/DI system — is worth considering if:
- Your source water TDS exceeds 400 ppm
- You’re growing highly sensitive crops with very narrow nutrient tolerances
- You’re operating a commercial facility where consistency across multiple reservoirs is critical
- Your RO membrane is aging and TDS rejection is declining
DI resin is consumable and needs replacement when exhausted (indicated by a rising TDS reading), adding an ongoing cost. For most hobbyist and semi-commercial growers, a well-maintained RO membrane alone delivers water pure enough for excellent results.
Setting Up Your Hydroponic RO System: Step-by-Step
Installation Basics
Installing a hydroponic RO system is a straightforward DIY project that typically takes 1–2 hours. Here’s a condensed walkthrough:
Step 1 — Choose Your Installation Point: Most growers install their RO system under a sink near the grow area or directly in the grow room. Ensure access to a cold water supply line (RO membranes work poorly with hot water) and a drain line for reject water.
Step 2 — Install the Feed Water Adapter: Use a saddle valve or push-fit connector to tap into your cold water supply line. Shut off water, drill the connection point, and secure the adapter.
Step 3 — Mount the Filter Housings: Using the included bracket, mount the pre-filter housings and RO membrane housing in the sequence specified by your system’s manual (sediment → carbon → RO membrane).
Step 4 — Connect the Tubing: RO systems use color-coded ¼-inch push-fit tubing. Follow the included diagram carefully — incorrect connections can compromise filtration performance.
Step 5 — Connect the Drain Line: Run the reject water line to your drain using the included flow restrictor. This restrictor maintains proper pressure across the membrane, which is critical for adequate rejection rates.
Step 6 — Flush the System: Before using RO water in your reservoir, flush the system by running 1–2 full tank volumes to waste. This removes carbon fines, manufacturing residues, and air pockets from the new membrane.
Connecting RO Water to Your Hydroponic Reservoir
For manual top-off systems, simply fill a clean storage container with RO water and use it to mix nutrients or top off your reservoir. For automated setups, consider:
- Float Valve Auto-Top-Off: A float valve connected to an RO storage tank or directly to the RO output automatically maintains reservoir water level.
- RO Barrel with Pump: A dedicated 30–55 gallon barrel filled with RO water, fitted with a small submersible pump, creates an easily accessible reserve for large systems.
Maintaining Your RO System for Long-Term Performance
Filter Change Schedule
Consistent maintenance is the difference between a system that performs for years and one that degrades silently, feeding your plants subpar water without your knowledge.
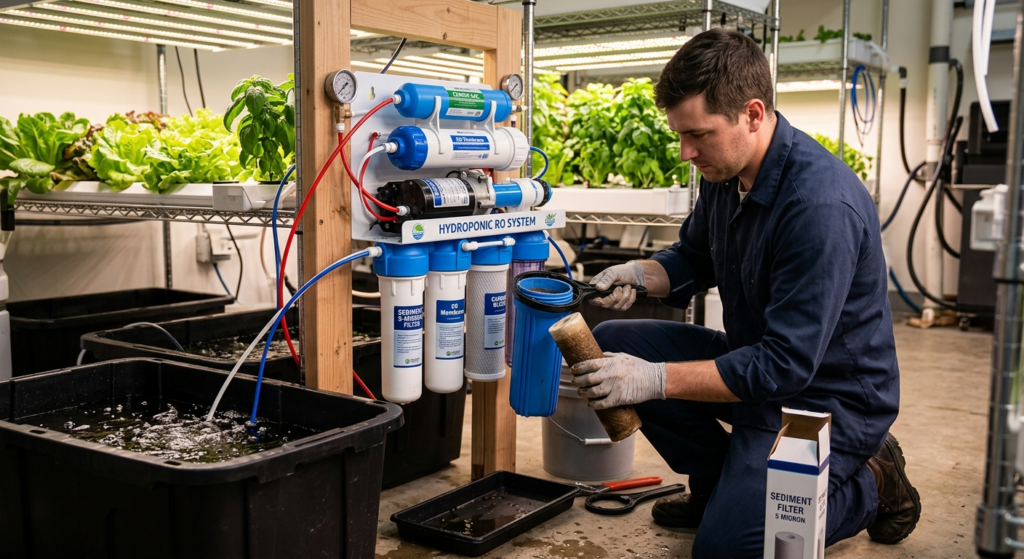
Sediment Pre-Filter: Replace every 6–12 months or when you observe reduced output flow. In high-sediment areas, replacement may be needed as frequently as every 3 months.
Carbon Block Pre-Filter: Replace every 6–12 months. Never extend carbon filter life past its rated gallonage — a failed carbon filter exposes the RO membrane to chlorine, causing irreversible damage within weeks.
RO Membrane: With proper pre-filtration, a quality membrane lasts 2–5 years. Replace when TDS rejection drops below 90% or when output TDS rises above acceptable levels for your growing standards.
DI Resin (if applicable): Replace when output TDS rises above 5 ppm, typically every 6–18 months depending on source water quality and usage volume.
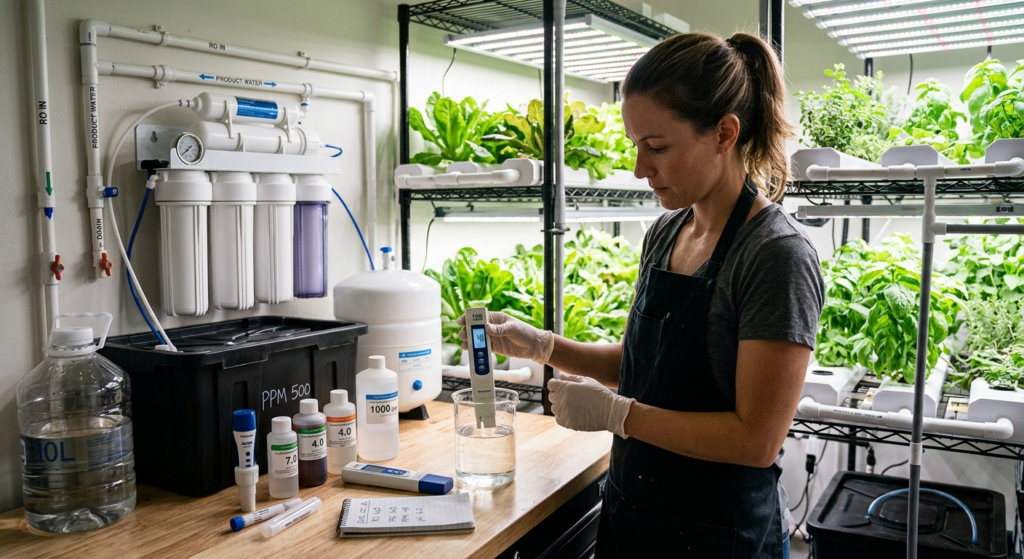
Monitoring Performance
Invest in an inexpensive handheld TDS meter (available for $10–$20) and test your RO output weekly. Log your readings. A steady, gradual increase in output TDS over months indicates normal membrane aging; a sudden spike suggests pre-filter failure or membrane damage requiring immediate attention.
Advanced Tips for RO Water in Hydroponics
Remineralizing RO Water Correctly
RO water is not inherently ideal for hydroponics out of the membrane — it’s ideal as a starting point. With near-zero TDS, it also lacks the baseline calcium and magnesium that many nutrient lines assume your source water provides.
Always use a “calcium-magnesium” (Cal-Mag) supplement when growing with RO water, or choose a nutrient line specifically formulated for RO or soft water. Many growers add Cal-Mag at 5–10 mL per gallon before adding any other nutrients, establishing a solid mineral baseline.
pH Adjustment with RO Water
RO water has very low buffering capacity (low alkalinity), which means pH can drift more easily — both a challenge and an advantage. While it requires slightly more attentive pH monitoring, it also means your pH adjustments are precise and responsive. Small amounts of pH-Up or pH-Down create predictable, stable changes.
Target 5.5–6.2 pH for most hydroponic crops, checking at least daily in active systems and adjusting as needed.
Water Temperature Considerations
RO systems produce water at ambient temperature. In cold climates or basement grows, RO water may be significantly cooler than your target reservoir temperature of 65–72°F (18–22°C). Allow RO water to reach room temperature before adding it to your reservoir, or use an aquarium heater in your RO storage container.
Conclusion: Transform Your Hydroponic Results with an RO System
The difference between mediocre hydroponic results and exceptional ones often comes down to inputs you can’t see — and water quality is the most overlooked input of all.
A hydroponic reverse osmosis system gives you the foundation every serious grower needs: water so pure that every nutrient, every pH adjustment, and every environmental decision you make lands exactly as intended. No hidden mineral interference. No pH battles. No scale-clogged equipment. Just clean, controlled, precision growing.
Whether you’re growing leafy greens in a small NFT system or running a large-scale commercial cannabis or vegetable operation, investing in an RO system is one of the highest-ROI decisions you can make. The upfront cost — typically $80–$300 for a quality home system — pays for itself quickly in reduced nutrient waste, better yields, healthier plants, and equipment that lasts years longer.
Start by testing your source water TDS with an inexpensive meter. If you’re above 100 ppm, you’re already leaving yield and quality on the table. Install an RO system, dial in your nutrients from a clean baseline, and watch your plants respond with the kind of vigorous, healthy growth you’ve been chasing.
Have questions about setting up your hydroponic RO system, or want to share your own results? Drop a comment below — and if this guide helped you, share it with a fellow grower who deserves better water.
Frequently Asked Questions About Hydroponic Reverse Osmosis Systems
Q1: Do I really need a reverse osmosis system for hydroponics, or will tap water work?
Whether you need an RO system depends largely on your source water quality. If your tap water tests below 100 ppm TDS and your local utility uses minimal chemical treatment, you may achieve acceptable results without one — at least initially. However, for the vast majority of growers, a hydroponic reverse osmosis system is strongly recommended.
Tap water quality varies widely by region and can change seasonally as municipalities adjust treatment protocols. Even “clean” tap water typically carries chlorine or chloramine, bicarbonates, calcium, and trace heavy metals that interfere with nutrient uptake, destabilize pH, and cause scale buildup in your system. An RO system eliminates these variables entirely, giving you a pure, consistent starting point every single time. For serious growers aiming to maximize yields and minimize crop problems, RO filtration isn’t a luxury — it’s a foundation.
Actionable tip: Test your tap water with an inexpensive TDS meter before deciding. If you read above 150 ppm, investing in an RO system will meaningfully improve your results.
Q2: What TDS level should my RO water be before adding nutrients to my hydroponic system?
The ideal TDS of RO-filtered water before nutrient addition is 0–30 ppm. Most quality reverse osmosis membranes deliver water in the 5–20 ppm range, which is considered an excellent blank slate for hydroponic nutrient mixing. If you add a deionization (DI) resin stage after the RO membrane, you can achieve 0–5 ppm consistently — essentially pure water.
Once you begin adding your nutrient solution, your target TDS (measured in ppm or EC) will vary depending on the crop and growth stage. Leafy greens like lettuce typically thrive at 560–840 ppm (1.1–1.7 EC), while fruiting crops like tomatoes and peppers prefer 1,400–2,450 ppm (2.0–3.5 EC) at peak growth. Starting from near-zero TDS source water ensures every ppm in your reservoir is a nutrient you intentionally added — and one your plants can fully use.
Q3: How much does a hydroponic RO system cost, and is it worth the investment?
Entry-level home RO systems suitable for small hydroponic setups typically cost $80–$200. Mid-range systems with higher GPD output, better membranes, and additional filtration stages run $150–$400. Commercial-grade systems for larger grow operations start around $500–$1,000 and scale upward based on output capacity.
The return on that investment becomes clear quickly. Consider the savings from reduced nutrient waste (nutrients go further when your water starts clean), fewer crop losses from mineral imbalances, less equipment damage from scale buildup, and higher, more consistent yields. For comparison, purchasing enough high-quality bottled or distilled water to run a medium hydroponic setup would cost far more per year than owning and maintaining an RO system. Most growers report that a home RO unit pays for itself within 3–6 months of use.
Q4: How much water does an RO system waste, and can I reuse the reject water?
Standard consumer RO systems produce 3–4 gallons of reject (drain) water for every 1 gallon of purified water — a ratio often expressed as 3:1 or 4:1. High-efficiency models and EPA WaterSense-certified systems reduce this to around 2:1 or even closer to 1:1, making them a significantly more sustainable choice for high-volume growers.
The good news: reject water isn’t contaminated in a dangerous sense. It’s simply a more concentrated version of your tap water, with higher dissolved mineral content. You can productively redirect it to outdoor gardens, potted soil plants, toilet flushing, washing vehicles, or mopping floors. What you should avoid is using reject water in your hydroponic reservoir — its elevated mineral content defeats the entire purpose of RO filtration. Redirecting your reject water line into a storage container rather than straight to the drain is an easy way to eliminate waste entirely.
Q5: What size RO system do I need for my hydroponic setup?
RO system size is rated in GPD (gallons per day). Choosing the right size depends on your reservoir volume, how frequently you change or top off your reservoir, and how many grow sites you maintain.
Here’s a practical sizing guide:
- Hobby setups (5–25 gallon reservoir, weekly changes): A 50–100 GPD system is more than sufficient. A 100 GPD unit produces roughly 4 gallons per hour under ideal water pressure.
- Intermediate setups (25–100 gallon reservoir, multiple systems): Consider a 100–150 GPD system to ensure you can fill or refresh your reservoir without waiting extended periods.
- Commercial or large-scale operations (100+ gallons, daily top-offs): Look at 300–1,000 GPD commercial systems, or consult a water treatment professional for a custom specification.
Also factor in whether you’ll use an RO storage tank (which holds pre-filtered water on demand) or draw directly from the RO output. A storage tank allows a smaller-rated system to meet larger periodic demands.
Q6: Does RO water affect the pH of my hydroponic nutrient solution?
Yes — and in a way that actually benefits you once you understand it. RO water has very low alkalinity (buffering capacity), which means it resists pH changes less than mineral-rich tap water. This is actually a significant advantage for hydroponic growers.
With tap water, dissolved carbonates and bicarbonates act as a buffer, constantly pushing pH back up toward neutral (7.0) and requiring heavy, frequent application of pH-Down to maintain the ideal hydroponic range of 5.5–6.2. This pH war wastes pH-adjusting chemicals and causes unpredictable swings.
With RO water, your pH adjustments are immediate, precise, and predictable. A small dose of pH-Down or pH-Up shifts the solution cleanly to your target. The trade-off is that pH can drift slightly more easily in very low-alkalinity water, so monitoring at least once daily is recommended for active systems. Overall, most growers find pH management becomes significantly easier — not harder — after switching to RO water.
Q7: Do I need to add calcium and magnesium when using RO water for hydroponics?
Yes, absolutely. This is one of the most important points for growers switching to a hydroponic reverse osmosis system for the first time. Because RO water strips out virtually all dissolved minerals — including calcium and magnesium — you cannot rely on your source water to provide these essential secondary nutrients.
Many standard hydroponic nutrient lines are formulated with the assumption that your source water already provides some baseline calcium and magnesium (typically from hard tap water). When you use RO water, that assumption no longer holds, and plants can develop deficiency symptoms quickly.
The solution is straightforward: use a dedicated Cal-Mag supplement as the first addition to your RO water before adding any other nutrients. Most growers add Cal-Mag at 5–10 mL per gallon of RO water, establishing a mineral baseline before building the rest of the nutrient solution. Alternatively, choose a nutrient line specifically formulated for soft or RO water, which will include adequate calcium and magnesium in its base formula.
Q8: How often do I need to replace the filters and membrane in my RO system?
A standard RO system requires three types of consumable maintenance:
- Sediment pre-filter: Replace every 6–12 months, or more frequently in areas with high sediment in the water supply. Signs of clogging include reduced output flow.
- Carbon block pre-filter: Replace every 6–12 months, strictly within its rated gallon capacity. Never delay carbon filter replacement — a failed carbon filter exposes the RO membrane to chlorine, causing rapid, irreversible membrane damage.
- RO membrane: With proper pre-filtration, a quality thin-film composite (TFC) membrane typically lasts 2–5 years. Replace it when output TDS rises noticeably, when rejection rate drops below 90%, or when output flow slows significantly.
- DI resin (if applicable): Replace when output TDS rises above 5 ppm, typically every 6–18 months depending on usage and source water quality.
The easiest way to monitor membrane performance is to track output TDS weekly with a handheld TDS meter. A gradual upward trend over months is normal aging; a sudden spike signals a problem requiring immediate attention.
Q9: Can I use a regular household drinking water RO system for hydroponics, or do I need a special one?
A standard under-sink household RO system will absolutely work for hydroponics — in fact, most home hydroponic growers use exactly these systems. The core filtration technology (sediment filter → carbon block → RO membrane) is identical whether the product is marketed for drinking water or hydroponics. The main differences to look for are:
- GPD output: Drinking water systems are often sized at 50–75 GPD, which may be sufficient for small setups but limiting for larger ones. Hydroponic-focused systems frequently start at 100 GPD and go much higher.
- DI stage availability: Some hydroponic-specific systems include a deionization resin stage for achieving 0 ppm output — this is less common in standard drinking water units.
- No storage tank required: Drinking water RO units typically include a pressurized storage tank designed for sink use. For hydroponics, many growers skip the tank and run output directly into a dedicated water storage barrel, which is more practical for filling large reservoirs.
In short: if you already have a household RO system, try it for your hydroponic setup before buying a new one. Just test the output TDS to confirm adequate performance.
Q10: What is the difference between RO water and distilled water for hydroponics — which is better?
Both RO water and distilled water produce very low TDS results suitable for hydroponics, but they differ in method, cost, and practicality.
Distillation involves boiling water and collecting the steam condensate, leaving behind virtually all dissolved solids (typically achieving 0–2 ppm). It’s extremely thorough, but distillers are slow, expensive to operate (high electricity consumption), and impractical for producing the volumes most hydroponic systems require.
Reverse osmosis achieves 5–20 ppm (or 0–5 ppm with a DI stage) through membrane filtration — a continuous, relatively fast, and energy-efficient process. For most growers, RO water is effectively equivalent to distilled water in terms of purity, while being dramatically more practical and cost-effective to produce at scale.
For hydroponic growing, RO water is the clear practical winner. It produces sufficient purity for precise nutrient management, can be generated on-demand at scale, and costs a fraction of distillation in both equipment and operating costs. Distilled water has its place for very small setups, lab-grade propagation, or situations where an RO system isn’t feasible — but for sustained hydroponic operations, RO is the industry standard.
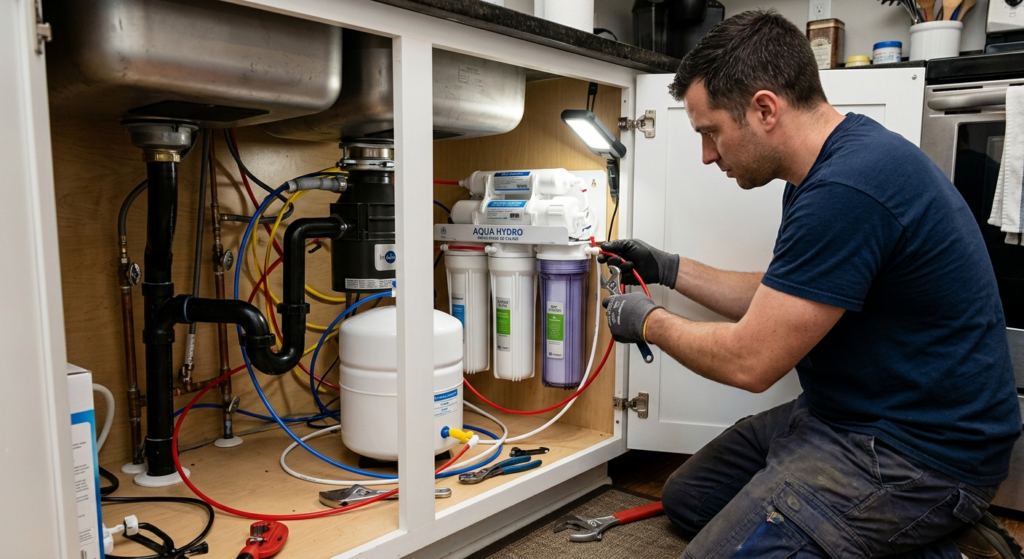
Q11: Can I install a hydroponic RO system myself, or do I need a plumber?
Most home hydroponic RO systems are designed for DIY installation and come with all necessary hardware, tubing, and step-by-step instructions. A basic under-counter installation typically takes 1–2 hours and requires no special plumbing skills — just the ability to follow directions and use a wrench.
The process involves: tapping into your cold water supply line with a saddle valve or push-fit connector, mounting the filter housings, connecting color-coded push-fit tubing in the correct sequence, and connecting the reject water line to a drain.
Where you might consider professional help: if your installation requires modifying copper pipes (requiring soldering), if you’re installing a large commercial system with high-pressure requirements, or if you’re running output lines to a remote grow room requiring significant plumbing runs. For standard hobby and semi-commercial setups, self-installation is entirely achievable and saves a meaningful amount of money.
Q12: Can I use RO water for seed starting and cloning in hydroponics?
RO water is actually considered ideal for seeds and clones, arguably even more important at this stage than during full vegetative or flowering growth. Young seedlings and clones have delicate, undeveloped root systems that are highly sensitive to mineral imbalances and chemical stress.
Starting with RO water allows you to create very dilute, precisely controlled nutrient solutions at the low concentrations (typically 200–400 ppm / 0.4–0.8 EC) appropriate for germination and early root development. The absence of chlorine, chloramine, and competing minerals also creates a more hospitable environment for developing root zones and any beneficial biology you introduce.
Many professional propagators use RO water exclusively for clone and seedling stages, gradually introducing higher nutrient concentrations as root systems establish and plants mature.
Have a question about hydroponic reverse osmosis systems that isn’t answered here? Drop it in the comments section below — our team reads every question and updates this FAQ regularly based on reader feedback. If this guide helped you, please share it with a fellow grower who deserves cleaner water and better yields.