Introduction: Why Your Hydroponic Sprayer Could Make or Break Your Harvest
Imagine spending weeks nurturing your hydroponic garden — carefully balancing nutrients, dialing in lighting, and monitoring pH — only to watch your plants slowly struggle despite doing everything else right. The culprit? A poorly chosen or misconfigured hydroponic sprayer delivering uneven misting, clogged nozzles, or insufficient root zone coverage.
Hydroponic sprayers are the unsung heroes of soilless growing systems. Whether you’re running a small aeroponic tower in your kitchen or managing a commercial NFT (nutrient film technique) setup, the sprayer system you choose directly determines how efficiently your plants receive oxygen, water, and dissolved nutrients. Get it right, and you’ll see explosive growth, higher yields, and healthier root systems. Get it wrong, and even the most expensive nutrients won’t save your crop.
This comprehensive guide walks you through everything you need to know about hydroponic sprayers: the different types available, how to choose the right one for your setup, installation best practices, maintenance routines, and how to troubleshoot the most common problems growers face. Whether you’re a weekend hobbyist or a serious commercial grower, this article will give you the knowledge to optimize your sprayer system and take your hydroponic results to the next level.
What Are Hydroponic Sprayers and Why Do They Matter?
The Role of Sprayers in Soilless Growing
In traditional soil gardening, the growing medium acts as a buffer — holding water and nutrients and slowly releasing them to plant roots. In hydroponic systems, that buffer is gone. Roots are exposed directly to the nutrient solution, and the delivery mechanism becomes critically important. Hydroponic sprayers serve as the primary delivery system for water, dissolved nutrients, and in many systems, oxygenated mist directly to the root zone.
The efficiency of that delivery system affects three key variables: nutrient uptake efficiency, root zone oxygenation, and water consumption. A well-designed sprayer system can reduce water usage by up to 90% compared to traditional soil growing while simultaneously delivering oxygen-rich mist that accelerates root development and nutrient absorption.
How Sprayers Differ From Traditional Irrigation
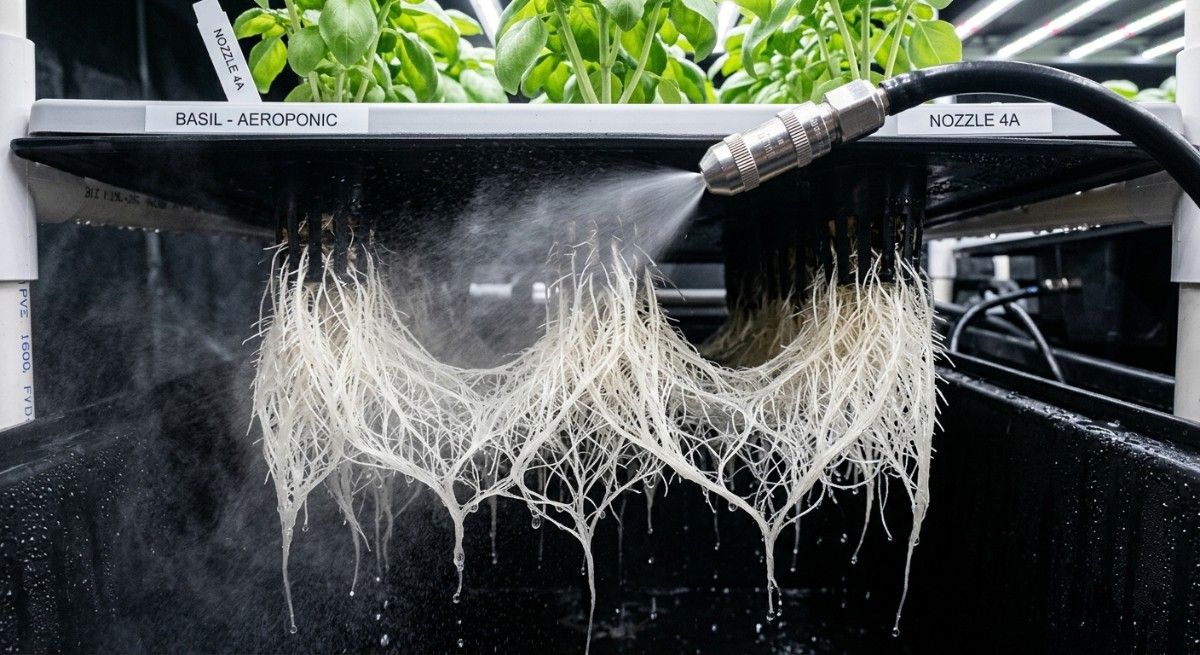
Unlike drip irrigation or flood-and-drain systems, hydroponic sprayers — particularly those used in aeroponic systems — atomize water into fine droplets or a mist. This atomization dramatically increases the surface area of the nutrient solution exposed to both the roots and the surrounding air. The result is a microclimate around the root zone that is simultaneously moist, oxygenated, and nutrient-dense — ideal conditions for rapid plant growth.
The key distinction is that sprayers don’t just deliver water; they create an environment. The droplet size, spray pattern, pressure, and cycle timing all combine to define the root zone climate your plants experience 24 hours a day.
Types of Hydroponic Sprayers: Understanding Your Options
Choosing the right hydroponic sprayer starts with understanding the core categories available to growers. Each type suits different system designs, plant types, and growing goals.
Micro-Spray and Fogger Nozzles
Micro-spray nozzles produce extremely fine droplets — often measured in microns — and are the backbone of true aeroponic systems. These nozzles operate at higher pressures (typically 60–100 PSI) to atomize the nutrient solution into a fog-like mist that coats root surfaces completely. Fogger-style nozzles, sometimes called ultrasonic foggers, use vibrating membranes to create an even finer mist without the need for high-pressure pumps.
Best for: True aeroponics, vertical tower gardens, and high-performance systems targeting maximum growth rates.
Key considerations: Fine nozzles are more susceptible to clogging from mineral buildup and require filtered water and frequent maintenance.
360-Degree Rotating Sprayer Heads
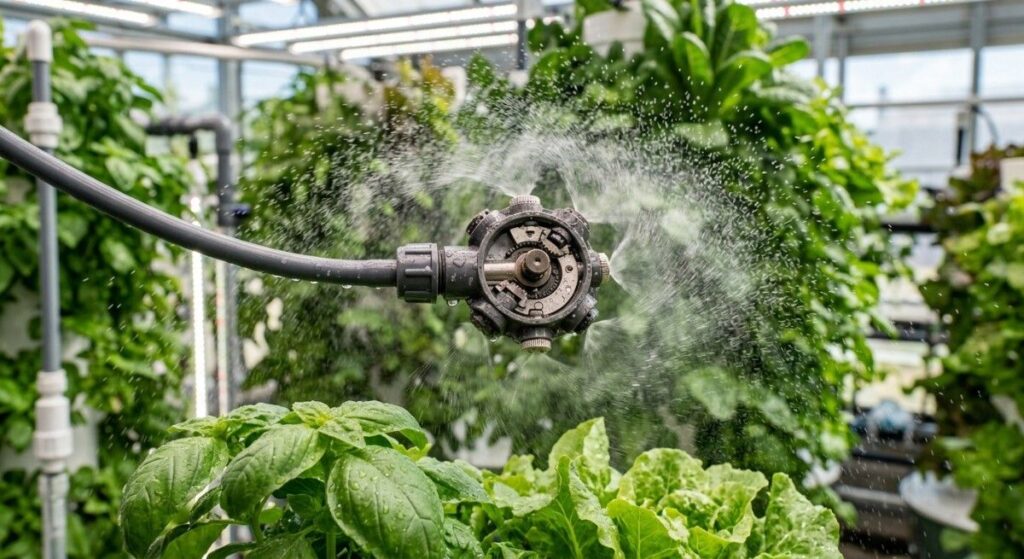
Rotating sprayer heads spin under water pressure, distributing mist in a full circle around each emitter point. These are among the most popular hydroponic sprayers for hobbyist and mid-scale systems because they offer excellent coverage without the maintenance demands of ultra-fine foggers.
Most rotating heads operate effectively at 20–60 PSI and produce droplets large enough to resist rapid evaporation in warm environments, ensuring nutrient solution reaches root tips rather than evaporating before contact.
Best for: Deep water culture (DWC) systems, bucket-style aeroponic setups, and indoor growing tents.
Key considerations: Ensure the rotation mechanism stays free of mineral deposits by using RO (reverse osmosis) or soft water in your system.
Drip Emitters and Low-Flow Sprayers
Not all hydroponic sprayers are about misting. Drip emitters deliver a controlled, low-flow stream of nutrient solution directly to the base of each plant. These are widely used in media-based hydroponic systems like coco coir or expanded clay aggregate setups where some wicking action from the medium is desirable.
Low-flow sprayers strike a balance between the precision of drip emitters and the coverage of spray heads, making them versatile for transitional systems or growers experimenting with different techniques.
Best for: Media-based hydroponic systems, NFT channels with supplemental feeding, and herb gardens.
Key considerations: Flow rate consistency is critical — even slight variation between emitters can create nutrient imbalances across your grow.
High-Pressure Aeroponic Sprayers
High-pressure aeroponic (HPA) systems represent the cutting edge of hydroponic sprayer technology. Operating at 80–100+ PSI, HPA nozzles produce droplets in the 30–80 micron range — small enough to be absorbed directly through root hair membranes without runoff. NASA famously demonstrated that plants grown in aeroponic environments with HPA systems can grow up to three times faster than soil-grown counterparts, largely due to the ultra-oxygenated root zone these systems create.
Best for: Advanced growers pursuing maximum growth rates, commercial operations, and research-oriented setups.
Key considerations: Requires a high-quality diaphragm or piston pump, stainless steel or high-grade plastic nozzles, and a robust filtration system to prevent clogging.
Choosing the Right Hydroponic Sprayer for Your Setup
Matching Sprayer Type to Your Growing System
The single most important factor in selecting a hydroponic sprayer is compatibility with your system type. Here’s a quick reference framework:
Aeroponic systems demand fine-mist nozzles capable of creating droplet sizes below 100 microns. True high-pressure aeroponics requires dedicated HPA nozzles and a pump capable of maintaining consistent pressure. Low-pressure aeroponics (LPA) systems can use standard rotating heads or micro-sprayers.
NFT (Nutrient Film Technique) systems typically use a thin film of nutrient solution flowing continuously across channel surfaces rather than spraying. However, supplemental sprayers at the inlet end of each channel can improve oxygenation and ensure even distribution. Low-flow drip emitters work well here.
Deep Water Culture (DWC) systems use an air pump and air stones for oxygenation rather than sprayers, but many hybrid systems incorporate overhead sprayers during the seedling phase before roots reach the reservoir. Rotating spray heads are ideal for this application.
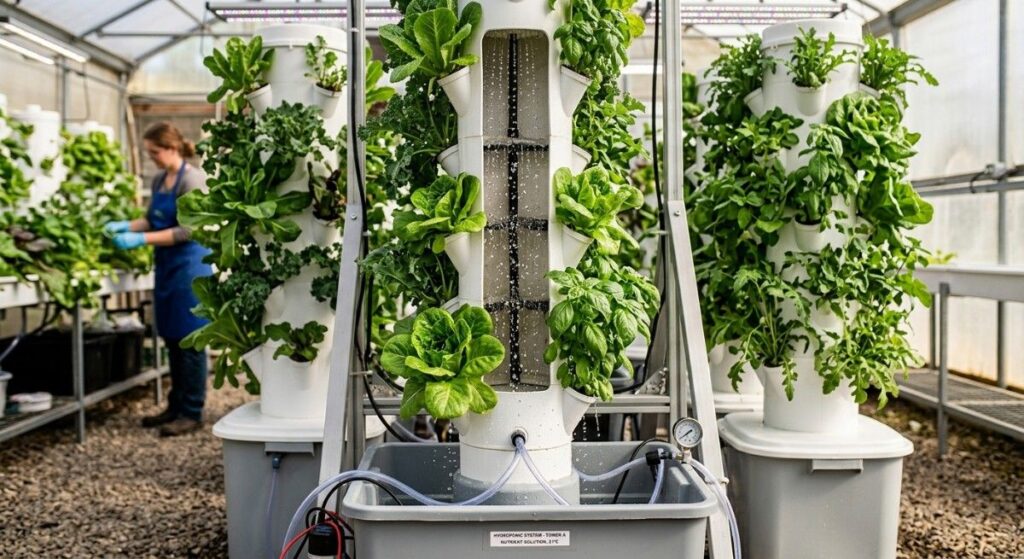
Vertical tower gardens rely almost entirely on drip or spray systems to deliver nutrients down through stacked growing pockets. 360-degree rotating sprayers or drip manifolds at the top of each tower are standard.
Nozzle Material and Durability
The material of your sprayer nozzles affects both longevity and water quality. Common materials include:
- Plastic (polypropylene or ABS): The most affordable option and suitable for low-pressure systems. Degrades over time with UV exposure and chemical contact.
- Stainless steel: Preferred for high-pressure systems and commercial applications. Resists corrosion and chemical degradation, and maintains orifice dimensions accurately over time.
- Brass: Durable and resistant to mineral buildup but can leach trace metals into your nutrient solution — not recommended for food production systems.
For most serious growers, stainless steel nozzles represent the best long-term investment, particularly in high-pressure aeroponic systems where orifice size precision directly affects droplet quality.
Flow Rate, Pressure, and Cycle Timing
Three technical specifications define the performance of any hydroponic sprayer system:
Flow rate (measured in gallons per hour or liters per hour) determines how much nutrient solution each nozzle delivers per unit of time. Match your total flow rate to your reservoir capacity and plant count to avoid over-watering or under-delivering nutrients.
Operating pressure must match your pump’s output and your nozzle’s design specifications. Running a high-pressure nozzle at low pressure produces large, uneven droplets; running a low-pressure nozzle at high pressure causes misting that evaporates before reaching roots.
Cycle timing — the intervals at which your sprayers activate — is one of the most impactful variables you can adjust. For aeroponic systems, cycles as short as 30 seconds on / 5 minutes off are common during the vegetative phase, while flowering plants often benefit from slightly longer off cycles to allow root surfaces to dry slightly between misting events.
Setting Up Your Hydroponic Sprayer System: A Step-by-Step Guide
Planning Your Layout and Calculating Coverage
Before purchasing any components, sketch your growing area and calculate the number of sprayer heads needed for complete root zone coverage. As a general rule, each 360-degree sprayer head in a standard bucket system covers a 6–12 inch radius depending on operating pressure. In tower systems, one drip emitter per growing site ensures consistent delivery.
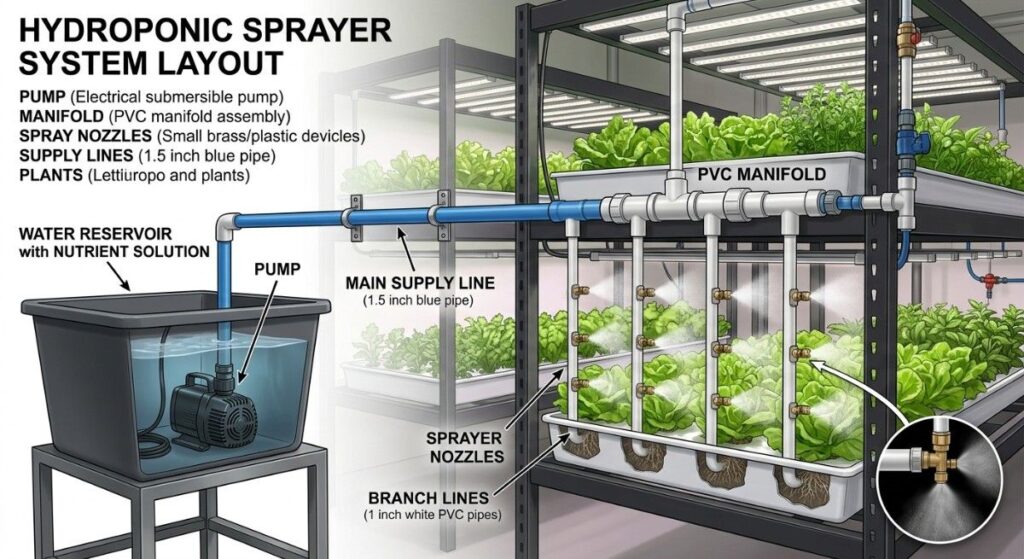
Map out your water supply line from reservoir to pump to distribution manifold to individual nozzles. The goal is a balanced system where pressure drop across each branch of the distribution network is equal — this ensures every sprayer operates at the same flow rate.
Installing Pumps, Manifolds, and Timers
The pump is the heart of your hydroponic sprayer system. Size your pump based on total flow requirement (sum of all nozzle flow rates plus a 20% safety margin) and the vertical lift height from reservoir to the highest sprayer head.
Install a manifold (distribution header) between the pump outlet and your individual spray lines. Use appropriately sized barbed fittings, grommets, and tubing rated for continuous water contact and your operating pressure. For high-pressure systems, use reinforced polyurethane tubing rather than standard vinyl, which can expand and rupture under sustained pressure.
Connect your pump to a digital timer capable of programming multiple on/off cycles per day. For aeroponic systems, look for timers with minute-level precision rather than the 15-minute increments common on basic irrigation timers.
Testing and Calibrating Your System
Before introducing plants, run your system with plain water for 24–48 hours to check for leaks, verify uniform pressure across all nozzle heads, and observe any potential clogging points. Use a simple catch container and timer to measure actual flow rate at each nozzle and compare against the manufacturer’s specification.
Adjust pressure if needed by throttling your pump outlet or using a pressure regulator inline. Document your baseline settings — pump pressure, cycle timing, flow rate per nozzle — so you have a reference point for future troubleshooting.
Maintaining Your Hydroponic Sprayer: Preventing Clogs and Buildup
Why Nozzle Maintenance Is Non-Negotiable
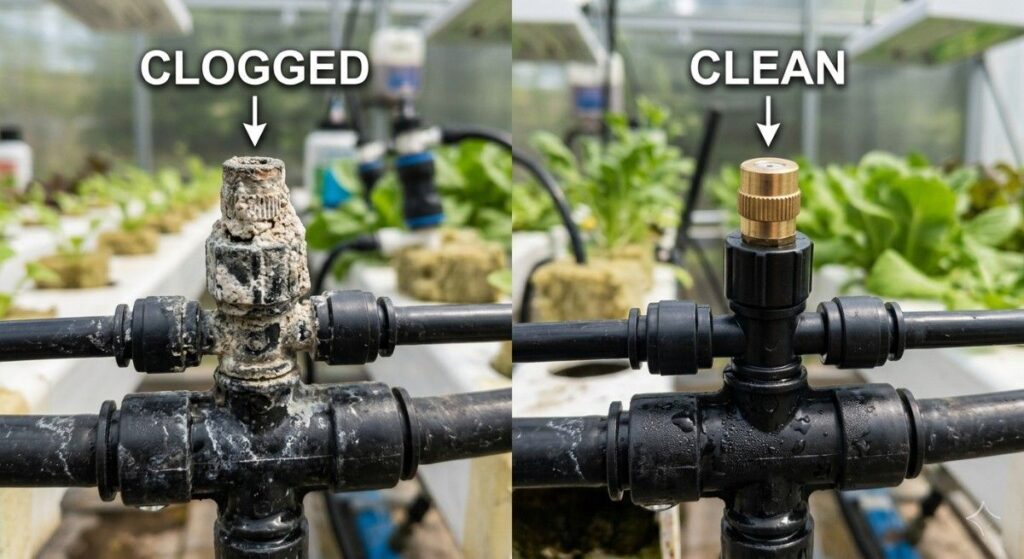
The most common failure point in any hydroponic sprayer system is nozzle clogging. Mineral salts from nutrient solutions, biofilm growth, and particulate matter from algae or root debris can restrict or fully block spray orifices within weeks of installation if maintenance is neglected. A partially clogged nozzle doesn’t just reduce flow — it alters the spray pattern and droplet size, creating dry spots in your root zone and uneven nutrient delivery.
Routine Cleaning Protocols
Establish a weekly cleaning routine for your nozzles. Remove nozzle heads from their stems and soak in a diluted citric acid solution (1–2 tablespoons per gallon of water) for 30–60 minutes to dissolve mineral deposits. Use a soft nylon brush or compressed air to clear any remaining debris from the orifice.
For systems using organic nutrients, monthly soaking in a diluted hydrogen peroxide solution (3% concentration) helps control biofilm formation in nozzles, tubing, and manifold components.
Water Quality and Filtration
The single most effective preventative measure against clogging is water quality management. Hard water with high calcium and magnesium content will create rapid mineral scaling inside nozzles. Growers using hard tap water should consider:
- Installing an inline sediment filter (50–100 micron) before the pump inlet
- Using RO water or mixing tap with RO to reduce total dissolved solids (TDS)
- Adjusting nutrient solution pH to the 5.5–6.5 range to minimize salt precipitation
For high-pressure aeroponic systems specifically, a 100-micron inline filter before the pump is essentially mandatory — fine nozzle orifices (as small as 0.5mm) will clog rapidly without pre-filtration.
Troubleshooting Common Hydroponic Sprayer Problems
Uneven Spray Patterns
Symptom: Some nozzles produce a full spray cone while others drip or spray in one direction.
Cause: Partial clogging, damaged nozzle orifice, or pressure imbalance in the distribution line.
Solution: Remove and inspect each affected nozzle. Soak in citric acid solution and test flow with the nozzle removed from the stem. If the orifice is physically damaged, replace the nozzle. If pressure imbalance is suspected, check for kinked tubing or debris in the manifold.
Pump Running but No Spray Output
Symptom: Pump is operating normally but sprayer heads produce little or no output.
Cause: Air lock in the pump, fully clogged primary filter, or pump failure.
Solution: Check and clean the inline filter first — a fully blocked sediment filter is the most common cause. If the filter is clear, check for air trapped in the pump head by briefly tilting the pump and allowing air to escape. If neither resolves the issue, check pump impeller for debris.
Root Zone Staying Too Wet or Too Dry
Symptom: Roots show signs of rot (too wet) or desiccation and browning at tips (too dry) despite sprayers operating normally.
Cause: Incorrect cycle timing for the current growth stage, ambient temperature extremes, or incorrect flow rate.
Solution: Adjust cycle timing — reduce on-time or increase off-time for wet conditions, and vice versa for dry conditions. In hot environments (above 80°F), roots dry faster and may require more frequent misting cycles. Monitor root zone visually after each adjustment period before making further changes.
Advanced Techniques: Getting More From Your Hydroponic Sprayer System
Combining Sprayer Types for Multi-Stage Growing
Experienced growers often use different sprayer configurations for different growth stages. During propagation and early seedling development, ultrafine foggers create the high-humidity environment cuttings need for root development. As plants mature, transitioning to 360-degree rotating sprayers or drip emitters provides the volume of nutrient solution required to support increasing biomass.
Designing a system with zone-specific sprayer types connected to separate timers and pressure circuits gives you precise control over the root zone environment throughout the entire growth cycle.
Monitoring and Automation
Modern hydroponic systems increasingly incorporate sensors and automation to optimize sprayer performance. Substrate moisture sensors placed in the root zone can trigger sprayer cycles based on actual moisture levels rather than fixed time intervals — eliminating both under- and over-watering conditions automatically. Combining these sensors with programmable controllers lets your system adapt to changing conditions, plant growth stages, and seasonal temperature variation without manual intervention.
Conclusion: Invest in Your Sprayer System and Your Plants Will Reward You
Hydroponic sprayers are far more than a simple component in your growing setup — they are the foundation of your root zone environment, and by extension, the foundation of your yields. Choosing the right sprayer type for your system, installing it correctly, maintaining clean nozzles, and fine-tuning cycle timing are the four pillars of a high-performing hydroponic operation.
The key takeaways from this guide are straightforward: match your sprayer type to your system design, invest in quality nozzle materials (stainless steel for serious setups), prioritize water filtration to prevent clogging, and never underestimate the impact of cycle timing on root health.
Whether you’re upgrading an existing system or designing a new one from scratch, the investment you make in your hydroponic sprayer infrastructure will pay dividends in faster growth, higher yields, and fewer crop losses throughout every grow cycle.
Have questions about optimizing your specific setup? Drop them in the comments below — we’d love to hear how your system is performing and help you dial it in further. And if this guide helped you, share it with a fellow grower who might benefit!
FAQ Section: Hydroponic Sprayers — Everything Growers Are Asking
How often should hydroponic sprayers run?
Spray cycle timing depends on whether you’re running a high-pressure or low-pressure system, as well as your plant’s current growth stage.
For high-pressure aeroponic (HPA) systems, the recommended cycle is typically 15 seconds ON followed by a 3–5 minute OFF interval, repeated continuously, day and night. Short bursts prevent 50-micron droplets from recombining into larger droplets on root surfaces, which would undermine the efficiency advantage of HPA.
For low-pressure aeroponic (LPA) systems, a longer cycle works better — commonly 5 minutes ON and 10–12 minutes OFF — because the larger droplets deeply saturate roots before the extended off-period allows oxygen exposure and nutrient absorption.
As a general principle across system types: you want roots to remain damp but not dripping between cycles. If roots stay permanently wet, increase off-time. If root tips show drying or browning, reduce off-time or shorten the interval between cycles.
Growth stage also matters — seedlings and clones in propagation benefit from more frequent misting to maintain high humidity, while flowering plants often perform better with slightly longer off cycles.
What size droplets should hydroponic sprayers produce?
Droplet size is one of the most impactful technical variables in aeroponic and misting systems. The ideal range for true high-pressure aeroponics is 30–80 microns in diameter. Droplets in this range are small enough to remain briefly suspended in the root chamber air, coat root hair surfaces evenly, and be absorbed through root cell walls with minimal runoff.
Droplets below 5 microns (produced by ultrasonic foggers) behave more like vapor, which can raise ambient humidity effectively but may not deliver sufficient nutrient load to root surfaces in high-biomass plants.
Droplets above 150 microns — typical of low-pressure systems and standard rotating spray heads — fall quickly, pool at root bases, and behave more like conventional drip irrigation. These still deliver nutrients effectively but sacrifice some of the oxygenation advantage that finer misting provides.
For most hobbyist growers using low-pressure aeroponic systems or rotating sprayer heads, droplet size in the 100–300 micron range is perfectly functional and far easier to maintain than ultra-fine HPA systems.
Why do hydroponic sprayer nozzles keep clogging?
Nozzle clogging is the most commonly reported problem with hydroponic sprayers, and it has three primary causes:
- Mineral salt buildup — Dissolved calcium, magnesium, and other minerals in your nutrient solution precipitate inside nozzle orifices over time, gradually restricting or blocking flow. This is especially common with hard tap water or concentrated nutrient formulas.
- Biofilm and algae growth — Organic matter from roots, decomposing plant material, or light leaking into your reservoir can promote bacterial and algal growth that coats the interior of nozzles and tubing.
- Particulate debris — Root debris, sediment from nutrient concentrates, or particles from unmixed nutrients can physically block fine orifices.
Prevention is far easier than clearing a blocked nozzle. Install an inline sediment filter rated at 50–100 microns before your pump, use filtered or RO water to reduce mineral content, and maintain a weekly nozzle-cleaning routine using a diluted citric acid soak. For biofilm, a monthly flush with 3% hydrogen peroxide solution keeps tubing and nozzle interiors clean.
What pump pressure do I need for hydroponic sprayers?
The required pump pressure depends entirely on the type of sprayer you’re using:
| Sprayer Type | Recommended Pressure |
|---|---|
| Drip emitters | 5–20 PSI |
| Rotating spray heads (LPA) | 20–45 PSI |
| Micro-spray nozzles | 30–60 PSI |
| High-pressure aeroponic nozzles | 60–100+ PSI |
For standard hobbyist systems using rotating spray heads, a submersible fountain or pond pump rated in GPH (gallons per hour) is often sufficient — these typically deliver 5–15 PSI of effective pressure at the nozzle. For high-pressure aeroponic setups, you’ll need a dedicated diaphragm or piston pump capable of sustained pressure above 60 PSI.
Always match your pump’s output to your nozzle’s operating specification. Running a fine aeroponic nozzle at insufficient pressure produces large, uneven droplets; running a standard rotating head at excessively high pressure causes misting that evaporates before reaching roots.
Can I use tap water in my hydroponic sprayer system?
You can, but with important caveats. Tap water varies widely in mineral content (hardness), chlorine levels, and pH depending on your location. Hard water with high calcium and magnesium concentrations will accelerate mineral scaling inside nozzles and tubing, dramatically increasing clogging frequency — particularly in fine-orifice HPA nozzles.
If you use tap water, test your water’s TDS (total dissolved solids) before mixing nutrients. Water above 200 ppm TDS will consume part of your nutrient formula budget and may create unpredictable mineral interactions.
For serious hydroponic setups, especially those using fine-mist nozzles, reverse osmosis (RO) water is the preferred starting point. RO water typically has TDS below 20 ppm, giving you a clean baseline that makes nutrient mixing more precise and virtually eliminates mineral scaling in nozzles.
At minimum, if using tap water, run it through a sediment filter and let it sit for 24 hours (or use a dechlorinator) before circulating it through your sprayer system.
How many sprayer heads do I need for my hydroponic system?
Coverage requirements depend on your system design and the spray radius of your chosen nozzle:
- Bucket/tote aeroponic systems: One to two 360-degree rotating sprayer heads per 5-gallon bucket provides adequate root zone coverage for most plant sizes during vegetative growth. Larger plants in flowering may benefit from a third head positioned to cover the upper root mass.
- Vertical tower gardens: One drip emitter or top-feed sprayer per growing site (pocket) ensures each plant receives consistent nutrition as solution cascades downward through the tower.
- NFT channels (supplemental sprayers): One inlet sprayer per channel is typically sufficient for supplemental oxygenation, with the channel length and flow rate doing the rest.
- Propagation/cloning systems: Higher nozzle density is beneficial during propagation — aim for full canopy coverage with heads spaced 6–8 inches apart to maintain the high-humidity environment cuttings need for root development.
As a general calculation guide: determine the spray radius of your chosen nozzle at your operating pressure (listed in manufacturer specifications), then position heads so their coverage areas overlap by 10–20% to eliminate dry spots.