Introduction: Why Your Growing Space Is the Bottleneck (Not Your Green Thumb)
You want to grow your own food. You have the motivation, maybe even the seeds. But what you don’t have is space — or at least, that’s what you think.
The truth is, most indoor gardeners are thinking in two dimensions when they should be thinking in three. A hydroponic shelf system turns your unused vertical space into a thriving, productive garden that operates year-round, regardless of outdoor conditions, climate, or the size of your apartment.
Whether you’re a beginner who has never grown a plant hydroponically, or an experienced grower looking to scale up efficiently, this guide covers everything: what a hydroponic shelf is, how to build or buy one, which crops thrive in vertical setups, and exactly how to maintain it for consistent, healthy harvests.
Let’s stop leaving vertical space — and growing potential — on the table.
What Is a Hydroponic Shelf?
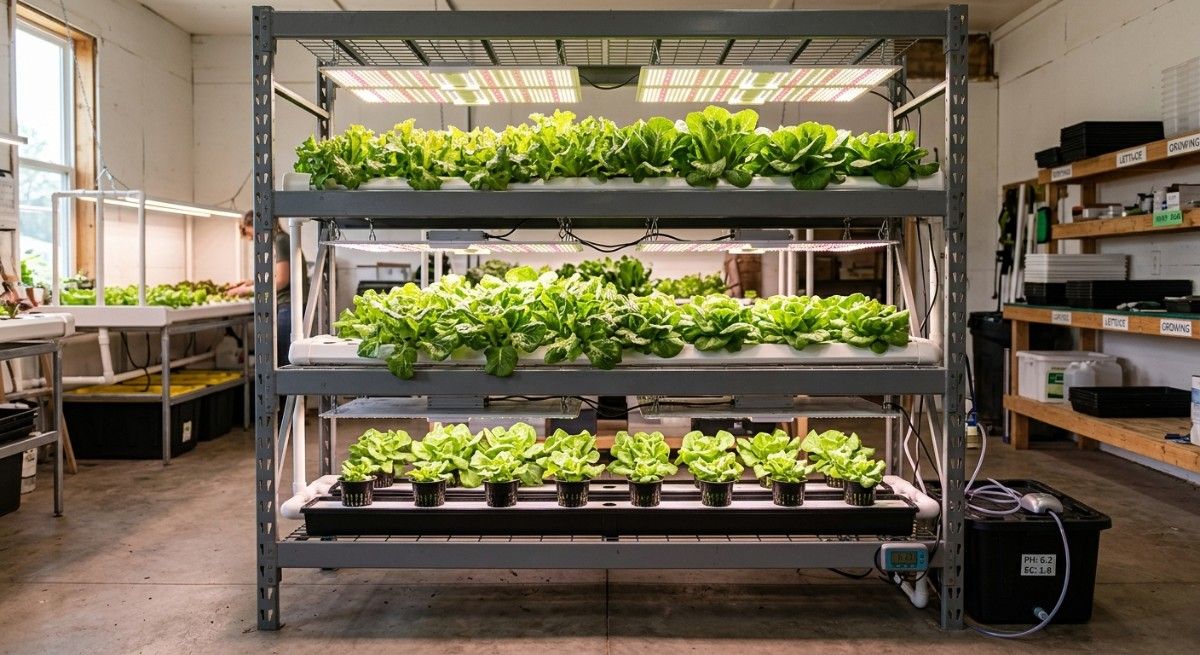
A hydroponic shelf (also called a vertical hydroponic system or grow shelf) is a multi-tiered growing structure that uses soilless, water-based nutrient delivery to cultivate plants across several horizontal levels stacked vertically. Each tier typically houses a grow tray, a reservoir or irrigation line, and one or more grow lights positioned above the plants.
Unlike traditional container gardening, a hydroponic shelf requires no soil. Instead, plant roots are suspended in or periodically flooded with a nutrient-rich water solution, giving them direct access to everything they need to grow — often 2–3x faster than soil-grown counterparts.
Key Components of a Hydroponic Shelf System
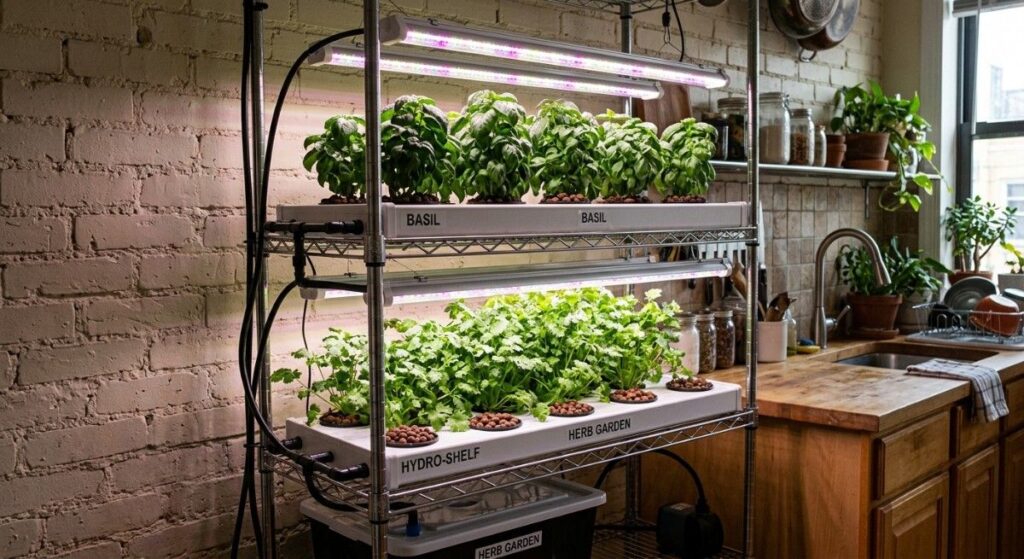
Every functional hydroponic shelf setup includes:
- The shelf structure — metal, wood, or modular PVC frames; must support weight and humidity
- Growing trays or channels — where plants sit, usually in net pots or foam collars
- Reservoir and pump — stores and circulates the nutrient solution
- Grow lights — full-spectrum LED panels positioned at each tier
- Nutrient solution — water mixed with macro and micronutrients
- Growing medium — rockwool, clay pebbles, coco coir, or hydroton
- Timer and controller — automates light cycles and watering schedules
- pH and EC meters — for monitoring water chemistry
How It Differs from a Standard Grow Shelf
A standard grow shelf is simply shelving with plants on it — using soil, pots, and ambient or supplemental light. A hydroponic grow shelf is an integrated system: the lighting, irrigation, and plant support are all engineered to work together for maximum efficiency. It’s the difference between parking a car in a garage versus running a pit crew operation in one.
Types of Hydroponic Systems Used in Shelf Setups
Choosing the right hydroponic method for your shelf determines how much maintenance you’ll do, how fast your plants grow, and what crops you can successfully cultivate.
Nutrient Film Technique (NFT)
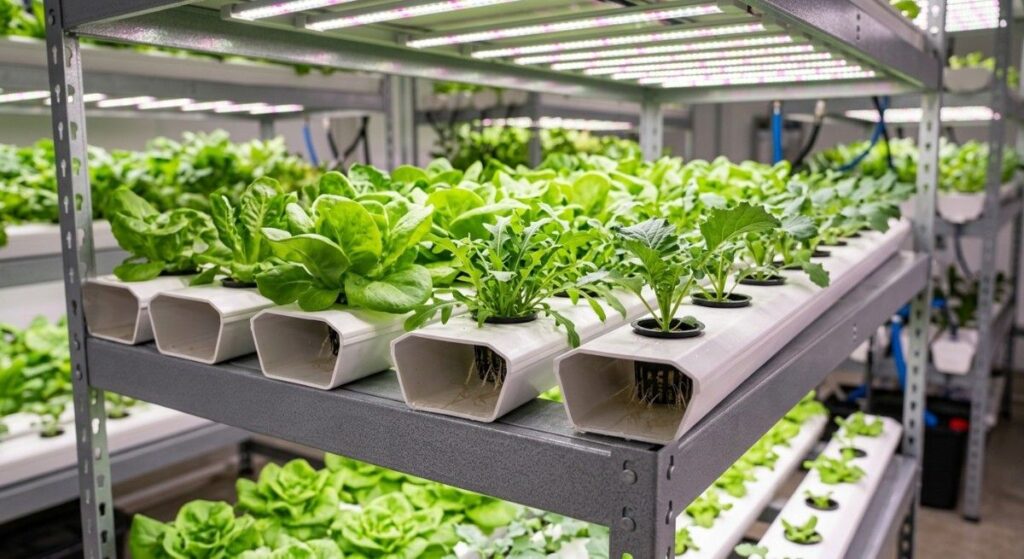
NFT systems run a thin, continuous film of nutrient solution along a sloped channel. Plant roots sit in the channel, with the lower portion touching the flow and the upper portion exposed to air. NFT is popular for hydroponic shelf gardens because the channels are lightweight, flat, and easy to stack vertically.
Best for: Lettuce, spinach, herbs, strawberries Pros: Water-efficient, simple plumbing, great oxygen access Cons: Pump failure can quickly stress plants
Deep Water Culture (DWC)
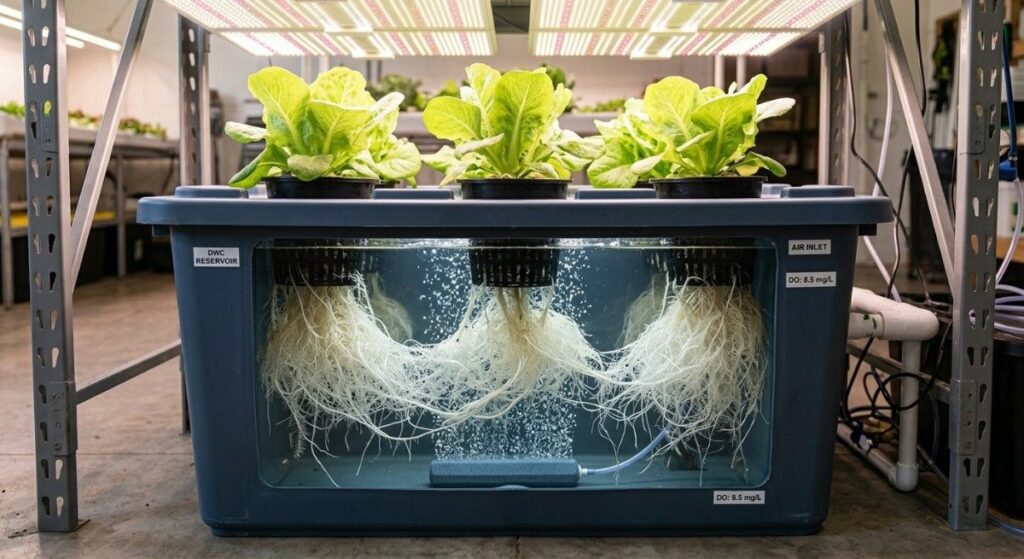
In DWC, plant roots are suspended directly in an oxygenated, nutrient-rich reservoir. An air pump keeps dissolved oxygen levels high to prevent root rot. DWC systems are excellent for shelf setups when each shelf tier has its own dedicated bucket or trough.
Best for: Lettuce, kale, basil, fast-growing leafy greens Pros: Simple, fast growth, low maintenance Cons: Heavier (water weight), requires reliable aeration
Kratky Method (Passive DWC)
The Kratky method is a non-circulating variant of DWC that needs no pump or electricity for irrigation. A gap of air between the water surface and the net pot allows roots to access both water and oxygen. Ideal for low-budget hydroponic shelf setups.
Best for: Lettuce, herbs, microgreens Pros: Zero moving parts, extremely low maintenance, beginner-friendly Cons: Not suited for heavy feeders or large fruiting plants
Ebb and Flow (Flood and Drain)
Ebb and flow systems periodically flood the grow tray with nutrient solution, then drain it back into a reservoir below. Controlled by a timer and pump, the intervals keep roots moist without drowning them. This method works well on shelves where trays sit above a central reservoir.
Best for: Tomatoes, peppers, herbs, larger vegetables Pros: Versatile, handles a wide range of crops Cons: More complex plumbing; pump failures require quick attention
Wick Systems
The simplest hydroponic method: an absorbent wick draws nutrient solution from a reservoir up to the root zone by capillary action — no pump required. Wick systems are the most beginner-friendly option for a small hydroponic shelf but aren’t suited for thirsty plants.
Best for: Herbs, lettuce, microgreens Pros: No electricity needed for irrigation, silent, low-cost Cons: Slow delivery rate limits crop options
Choosing the Right Hydroponic Shelf Structure
The physical shelf is the backbone of your entire setup. Getting this wrong means instability, uneven weight distribution, or inadequate airflow — all of which undermine your garden’s success.
Metal Wire Shelving Units
Heavy-duty wire shelving (like NSF-certified commercial shelving or wire metro racks) is the most popular choice for DIY hydroponic shelf builds. Wire frames allow excellent airflow and light penetration, hold significant weight, and are easy to adjust. They’re also rust-resistant when made from chrome-coated or stainless steel.
Recommended specs:
- Load capacity: 200–500 lbs per shelf
- Height: 72 inches (6 tiers)
- Width: 48 inches (standard grow tray width)
- Depth: 18–24 inches
Wooden Shelf Frames
Wood shelves offer a more aesthetic appearance and can be built to custom dimensions. However, untreated wood absorbs moisture and may warp or rot in a humid grow environment. If using wood, seal all surfaces with polyurethane or use cedar (naturally moisture-resistant).
Modular PVC or Aluminum Systems
Pre-engineered modular hydroponic shelf kits — such as those from Tower Garden, Lettuce Grow, or Vivosun — offer convenience at a premium price. They’re designed specifically for hydroponics, often including integrated lighting mounts, drip channels, and nutrient reservoirs. Excellent for beginners who want a plug-and-play solution.
DIY vs. Pre-Built: Which Is Better?
| Factor | DIY Shelf | Pre-Built Kit |
|---|---|---|
| Upfront Cost | Lower ($50–$200) | Higher ($200–$800+) |
| Customization | High | Limited |
| Setup Time | 2–6 hours | 30–90 minutes |
| Scalability | Easy to expand | Often fixed |
| Aesthetics | Variable | Usually polished |
For most growers, starting with a sturdy metal wire shelf and building the hydroponic system around it offers the best balance of cost, flexibility, and performance.
Grow Lights for Hydroponic Shelves: What You Actually Need
Light is the single most important variable in your hydroponic shelf garden. Without adequate, full-spectrum light, even the best nutrient solution and growing system won’t produce healthy plants.
Why Full-Spectrum LED Grow Lights Are the Standard
Modern full-spectrum LED grow lights deliver the wavelengths plants need most — primarily blue light (400–500nm) for vegetative growth and red light (620–700nm) for flowering and fruiting — while running cool and energy-efficiently. For shelf-based grows, low-profile LED bars or panel lights are preferred because they fit between tight tier spacing without generating excessive heat.
How Much Light Does Each Shelf Tier Need?
Light intensity is measured in PPFD (Photosynthetic Photon Flux Density, in μmol/m²/s). As a practical guide:
- Leafy greens and herbs: 150–250 μmol/m²/s
- Fruiting crops (tomatoes, peppers): 400–600 μmol/m²/s
- Seedlings and microgreens: 100–150 μmol/m²/s
Most 2-ft LED grow light bars designed for shelves produce 200–400 μmol/m²/s at 12 inches — perfectly adequate for leafy greens, herbs, and microgreens.
Recommended Shelf Tier Spacing for Lighting
Tier spacing determines how far your plants can grow before hitting the light or the shelf above. For most hydroponic shelf builds:
- Microgreens and seedlings: 12–14 inches between tiers
- Herbs and leafy greens: 16–18 inches
- Fruiting vegetables: 24–36 inches (usually only feasible on the top tier)
Light Cycle Automation
Always use a timer to control your light cycles. Most leafy greens and herbs thrive on 14–16 hours of light and 8–10 hours of darkness. Fruiting crops may need 12/12 cycles to trigger flowering. A basic mechanical outlet timer costs under $10 and removes the need to manually switch lights.
Nutrient Solutions and Water Chemistry
Hydroponics lives or dies on water quality. Unlike soil, which buffers pH and holds nutrients, a hydroponic system has no buffer — your plants only get what’s in the water.
Choosing a Hydroponic Nutrient Formula
Look for a complete hydroponic nutrient solution that includes:
- Macronutrients: Nitrogen (N), Phosphorus (P), Potassium (K)
- Secondary nutrients: Calcium, Magnesium, Sulfur
- Micronutrients: Iron, Manganese, Zinc, Boron, Copper, Molybdenum
Popular shelf-friendly options include General Hydroponics Flora Series, MaxiGro/MaxiBloom, and MasterBlend 4-18-38. Many come as two- or three-part systems that you mix according to the plant’s growth stage.
pH Management: The Most Critical Variable
pH should stay between 5.5 and 6.5 for most hydroponic crops. Outside this range, nutrient lockout occurs — plants can’t absorb minerals even when they’re present in the water.
Check pH daily for new setups, then every 2–3 days once stable. Use pH Up (potassium hydroxide) or pH Down (phosphoric acid) solutions to make adjustments in small increments.
EC (Electrical Conductivity) and Nutrient Strength
EC measures the concentration of dissolved minerals in your solution. Higher EC = stronger nutrient mix.
- Seedlings: 0.8–1.2 mS/cm
- Leafy greens and herbs: 1.2–2.0 mS/cm
- Fruiting crops: 2.0–3.5 mS/cm
Invest in a combination pH/EC meter (often called a “combo pen”) — it costs $20–$50 and is indispensable for hydroponic shelf maintenance.
Water Temperature and Reservoir Management
Keep your nutrient solution between 65–72°F (18–22°C). Warmer water holds less dissolved oxygen and encourages harmful bacterial and algal growth. Change your reservoir fully every 7–14 days to prevent salt buildup and pathogen development.
Best Plants to Grow on a Hydroponic Shelf
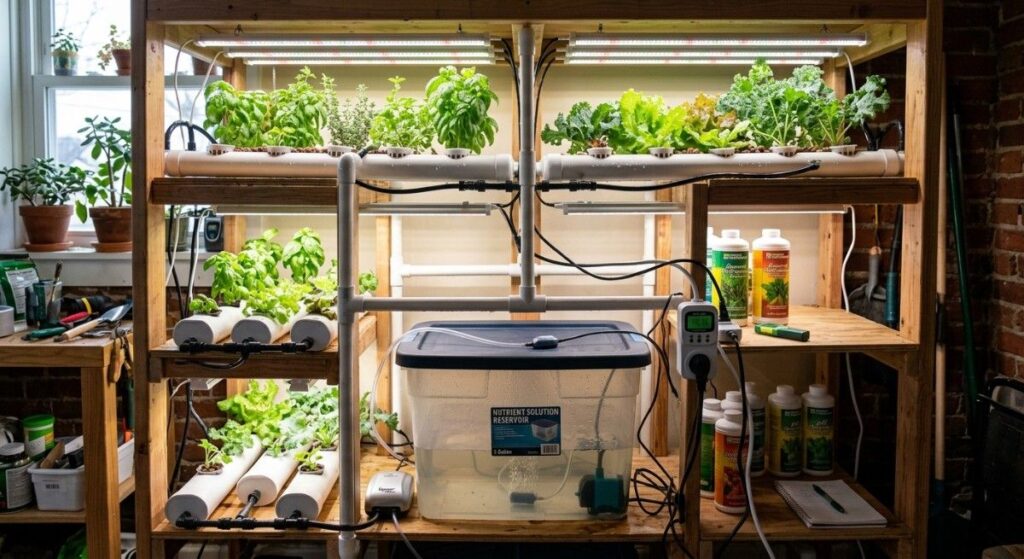
Not every plant is well-suited to shelf-based hydroponics. The best crops are fast-growing, compact, and thrive under artificial light.
Leafy Greens
Lettuce, spinach, arugula, Swiss chard, and kale are the workhorses of any hydroponic shelf garden. They grow quickly (harvest in 3–5 weeks), require modest light, and tolerate the nutrient concentrations typical of beginner setups. Successive planting — starting new seeds every 1–2 weeks — creates a continuous harvest cycle.
Herbs
Basil, cilantro, mint, parsley, chives, and dill all perform exceptionally well on hydroponic shelves. Herbs are high-value crops that are expensive to buy fresh, making them among the best return-on-investment plants for indoor hydroponic growing. Basil, in particular, grows 2–3x faster in a well-maintained DWC or NFT system than in soil.
Microgreens
Microgreens are harvested 7–14 days after germination, making them the fastest-cycling crop in any hydroponic shelf setup. They don’t even require a full hydroponic system — shallow trays with a growing medium and a moisture-retentive setup work fine. Microgreens such as sunflower, radish, pea shoots, and broccoli are highly nutritious and sell for premium prices at farmers’ markets.
Strawberries
Strawberries are surprisingly well-suited to hydroponic shelves, especially day-neutral varieties like Albion or Seascape that fruit continuously. They require higher light intensity and a slightly higher EC than leafy greens, but reward the extra attention with sweet, consistent harvests.
Cherry Tomatoes and Dwarf Peppers
If your shelf has adequate vertical clearance on the top tier (24+ inches) and strong grow lights, compact varieties of tomatoes and peppers can thrive. Look for determinate or patio varieties — Tumbling Tom tomatoes and Lunchbox peppers work well.
Building Your Own Hydroponic Shelf: Step-by-Step
Here’s a practical walkthrough for building a three-tier hydroponic shelf using the Kratky or DWC method — ideal for beginners.
Step 1: Select and Assemble Your Shelf
Purchase a 48″ x 18″ x 72″ wire shelving unit. Assemble it with four or five tiers spaced 18 inches apart. Ensure it’s level and stable — add locking caster wheels if you want mobility.
Step 2: Mount Grow Lights on Each Tier
Attach two 2-ft LED grow light bars (or one 4-ft bar) to the underside of each shelf tier using the included mounting hardware or zip ties. Position lights so they’ll hang 10–14 inches above your plant canopy.
Step 3: Set Up Growing Containers
For Kratky or DWC, use 5-gallon buckets or opaque storage totes (opacity prevents algae growth). Drill holes sized for 2-inch net pots in the lid — typically 4–6 holes per tote for lettuce, or individual holes for larger plants.
Step 4: Mix and Add Nutrient Solution
Fill each reservoir to about 1–2 inches below the net pot holes. Mix your nutrient solution to the appropriate EC (start at 1.2–1.4 for leafy greens) and adjust pH to 5.8–6.2. Record your baseline readings.
Step 5: Insert Plants or Seedlings
Place seedlings (started in rockwool cubes or rapid rooter plugs) into net pots with a small amount of clay pebbles to anchor them. Make sure the root tip reaches — or nearly reaches — the solution surface.
Step 6: Connect Timers and Run Your Cycle
Set light timers for 16 hours on / 8 hours off. For DWC or Kratky, no irrigation timer is needed. Check pH and EC every 2–3 days and top off with plain pH-adjusted water as levels drop.
Step 7: Monitor and Harvest
Most leafy greens are ready for a first cut in 3–4 weeks. Use the “cut and come again” harvesting method — snip outer leaves and let the plant continue growing for multiple harvests from the same plant.
Common Problems on Hydroponic Shelves (and How to Fix Them)
Even well-designed systems encounter issues. Knowing how to diagnose problems quickly is what separates productive growers from frustrated ones.
Yellowing Leaves
Most likely cause: Nitrogen deficiency or pH out of range (causing nutrient lockout). Fix: Check pH first. If it’s outside 5.5–6.5, adjust it before adding more nutrients. If pH is correct, increase EC slightly or add a nitrogen-heavy formula.
Root Rot (Brown, Slimy Roots)
Most likely cause: Warm water temperature, low dissolved oxygen, or light leaking into the reservoir. Fix: Reduce reservoir temperature to below 72°F. Add an air stone and pump. Ensure your reservoir is completely light-proof. Add beneficial bacteria (like Hydroguard) to outcompete pathogens.
Leggy, Stretching Plants
Most likely cause: Insufficient light intensity or lights positioned too far from the canopy. Fix: Lower your grow lights (maintain 10–14 inches from canopy for most crops). Consider upgrading to higher-output LED bars.
Algae Growth
Most likely cause: Light exposure in the nutrient reservoir or nutrient channels. Fix: Cover all water surfaces and make reservoirs fully opaque. Clean and sterilize the system during your next reservoir change.
Wilting Despite Adequate Nutrients
Most likely cause: Root zone waterlogging (too little air exposure) or temperature stress. Fix: For Kratky systems, allow a larger air gap between the water surface and net pot base. Check that roots are not perpetually submerged without access to air.
Scaling Your Hydroponic Shelf System
Once you’ve mastered one shelf, the logical next step is scaling — more tiers, more shelves, or transitioning to a dedicated grow room or grow tent setup.
Adding More Tiers
Most commercial wire shelving supports five to six tiers. As you add tiers, consider upgrading to a stronger nutrient delivery system — a central reservoir with a recirculating pump feeding all tiers is more efficient than managing individual reservoirs per shelf.
Multiple Shelf Units
Placing two or three shelf units side by side in a dedicated room allows for serious production. A 4-unit setup (each 4ft wide, 6 tiers) gives you roughly 96 square feet of growing surface in a 6×8 foot floor space — enough to supply a family with fresh greens year-round.
Automation and Monitoring
As your system grows, automation pays off exponentially:
- Auto-dosing systems (like Bluelab or Dosatron units) maintain nutrient strength automatically
- WiFi-enabled pH/EC monitors send alerts when parameters drift
- Environmental controllers manage temperature, humidity, and CO₂ levels
- Automated top-off reservoirs maintain water levels without daily attention
Cost Breakdown: What Does a Hydroponic Shelf System Actually Cost?
Understanding the real costs — upfront and ongoing — helps you plan realistically and calculate your return on investment.
Budget Starter Setup (1 Shelf, 3 Tiers, Kratky Method)
| Item | Estimated Cost |
|---|---|
| Wire shelving unit (48″ x 72″) | $60–$90 |
| LED grow light bars (x3) | $60–$120 |
| Storage totes + net pots | $20–$40 |
| Nutrient solution (starter kit) | $20–$40 |
| pH/EC meter | $20–$50 |
| Growing medium (clay pebbles) | $15–$25 |
| Seeds | $10–$20 |
| Total | $205–$385 |
Mid-Range Setup (1 Shelf, 5 Tiers, NFT or DWC)
| Item | Estimated Cost |
|---|---|
| Heavy-duty shelving + casters | $100–$150 |
| High-output LED panels (x5) | $150–$300 |
| NFT channels or DWC totes | $60–$120 |
| Pump, tubing, timer | $40–$80 |
| Nutrient kit + pH management | $50–$80 |
| Meters + monitoring tools | $50–$100 |
| Total | $450–$830 |
Monthly Operating Costs
A 3-tier shelf running 16-hour light cycles with LED bars consumes roughly 60–120 kWh per month, costing $7–$15 at average US electricity rates. Nutrients, water, and growing media typically add another $10–$20/month.
Hydroponic Shelf Maintenance: Keeping Your System Healthy Long-Term
Consistency is the key to long-term hydroponic success. A simple maintenance routine prevents most problems before they start.
Daily Checks (5 Minutes)
- Check that lights are on/off at correct times
- Visually inspect plants for signs of stress or pests
- Check reservoir water level (top off if needed)
Every 2–3 Days
- Measure and record pH
- Measure and record EC
- Adjust pH if outside 5.5–6.5 range
Weekly
- Inspect roots for color and health
- Clean up any dead leaves to prevent mold
- Check pumps and air stones (if applicable)
- Record plant growth progress
Every 1–2 Weeks
- Full reservoir change (drain, rinse, refill with fresh nutrient solution)
- Rinse growing channels or trays if residue is visible
- Sanitize any tools used in the system
Conclusion: Your Vertical Garden Starts Today
A hydroponic shelf isn’t just a clever use of space — it’s a fundamentally better way to grow food indoors. You get faster growth, higher yields per square foot, year-round harvests, and complete control over your plants’ environment. Whether you’re growing microgreens for your morning smoothie, herbs for daily cooking, or enough lettuce to never buy a bag again, a hydroponic shelf system makes it achievable in any home.
The barrier to entry has never been lower. A functional starter system costs under $300, takes a few hours to set up, and can produce its first harvest within three to four weeks. From there, you scale at your own pace.
Start with one shelf. Master your pH. Perfect your light cycle. Then grow from there — quite literally.
Have you built your own hydroponic shelf, or are you just getting started? Drop a comment below with your setup, your questions, or your biggest wins. And if this guide helped you, share it with a fellow gardener who’s running out of windowsill space.